EL SECRETO: LAS CAPAS / THE SECRET: THE LAYERS
¿ Es posible conseguir un acabado hiperrealista en una ilustración digital ?
¿Se puede simular con éxito en un retrato digital la piel humana ?
La respuesta es “si”.
Trabajar digitalmente aporta un sinfín de ventajas, además de ahorrar mucho
tiempo y material se pueden conseguir efectos sorprendentes muy difíciles de
lograr utilizando técnicas tradicionales.
Is it possible to get a hyperrealistic finish in a digital illustration ?
Can human skin be successfully simulated in a digital portrait ?
The answer is “yes».
Working digitally provides endless advantages, in addition to saving a lot of time
and material you can achieve surprising effects very difficult to accomplish
using traditional techniques.
¿ QUÉ SON LAS CAPAS ? / WHAT ARE THE LAYERS ?


Las capas son elementos transparentes en los que se puede dibujar y añadir
cualquier cosa. Gracias a esa transparencia se pueden agregar sucesivas
capas para ir incorporando detalles a la imagen. La suma de todas ellas da
como resultado la ilustración final.
Para que comprendas mejor mi metodología de trabajo, en esta página
encontrarás varios ejemplos del proceso creativo de una ilustración o retrato
digital. A grandes rasgos, hago lo siguiente…
El primer paso es crear las “siluetas” que utilizaré posteriormente como
máscaras para trabajar las distintas zonas de la imagen. Se trata de crear
trazados y posteriormente convertirlos a “selecciones” que almaceno en el
archivo digital ( cada una en un canal ) para activarlas cuando las necesito. De
este modo, puedo trabajar en una zona concreta sin “manchar” las demás. Es
un proceso similar a las máscaras que se utilizan en aerografía.
Luego, empiezo a definir el fondo de la ilustración, y los colores base de la piel,
etc…
El siguiente paso es trabajar en la textura de la piel en una capa aparte ( es el
paso más importante, y el que dará realismo a la obra resultante ).
Posteriormente, en otra capa más, añado el pelo. Una capa adicional para las
cejas y las pestañas, así como los pequeños cabellos sueltos…
Pequeños matices como el color rosado de las mejillas o los efectos de
maquillaje se añaden en una capa aparte.
Por supuesto, puedo alterar el orden de apilamiento de las capas ( colocar una
sobre otra o viceversa ), así como su opacidad, también es posible enmascarar
parcialmente una capa, o alterar el modo en que la “pintura” depositada en ella
afecta a las capas inferiores.
Finalmente, si la ilustración lo requiere, incluyo un halo alrededor de la figura y
la firma.
Layers are transparent elements in which you can draw and add anything.
Thanks to this transparency successive layers can be added to incorporate
details into the image. The sum of all of them results in the final illustration.
In order to better understand my work methodology, on this page you will find
several examples of the creative process of an illustration or digital portrait.
Roughly, I do the following …
The first step is to create the «silhouettes» that I will use later as masks to work
the different areas of the image. It is about creating paths and then converting
them to «selections» that I store in the digital file ( each one in a channel ) to
activate them when I need them. In this way, I can work in a specific area
without «smearing» the others. It is a process similar to the masks that are used
in airbrushing.
Then, I begin to define the background of the illustration, and the base colors of
the skin, etc …
The next step is to work on the texture of the skin in a separate layer ( it is the
most important step, and the one that will give realism to the resulting work ).
Later, in another layer, I add the hair. An additional layer for eyebrows and
eyelashes, as well as small loose hair …
Small details such as the pink color of the cheeks or makeup effects are added
on a separate layer.
Of course, I can alter the order of stacking of the layers (placing one on another
or vice versa), as well as their opacity, it is also possible to partially mask a
layer, or to alter the way in which the «paint» deposited on it affects the lower
layers.
Finally, if the illustration requires it, I include a glow around the figure and the
signature.
ALGUNOS EJEMPLOS / SOME SAMPLES
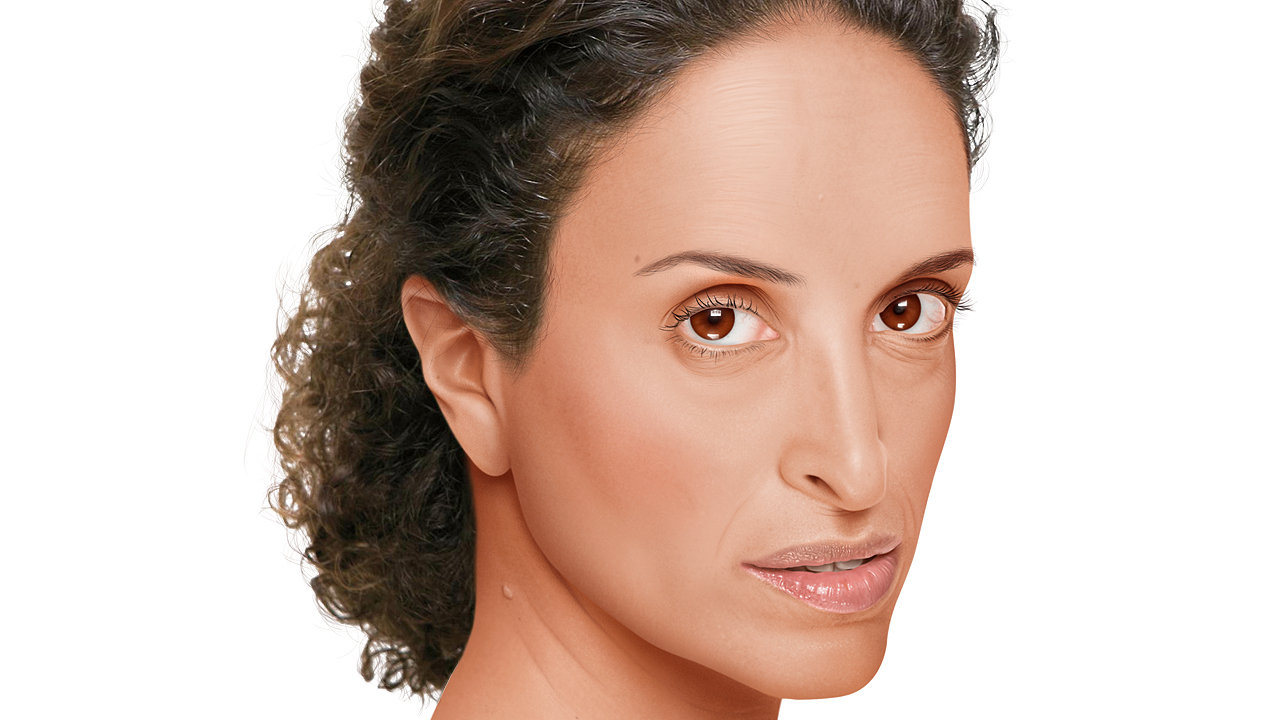
ACHINOAM NINI
Disfruté mucho realizando este retrato digital de la cantante israelí Achinoam
Nini ( más conocida como Noa ), por cuya magnífica voz y exóticos rasgos
siempre me he sentdo fascinado.
Aquí se aprecian perfectamente los pasos explicados anteriormente…
I really enjoyed doing this digital portrait of the Israeli singer Achinoam Nini
( better known as Noa ), whose magnificent voice and exotic features I have
always been fascinated.
Here you can clearly see the steps explained above …


JEDI MISTRESS
Un día ( creo que mientras veía la película “Iron Man 2” ) se me ocurrió la idea
de un “látigo laser”. Pero pasó un tiempo hasta que encontré la inspiración para
integrar esa idea en una ilustración…
Empecé creando el fondo para la imagen, posteriormente el color base para la
chica, en otra capa aparte integré los detalles de la piel y las sombras, después
añadí la ropa y las cejas, el pelo, los pendientes, el maquillaje facial…
En las últimas etapas incorporé la empuñadura y el látigo, el resplandor rojo y
un fino ribete rojo silueteando a la chica.
Los últimos toques consistieron en añadir unos brillos a los elementos
metálicos de la ropa, el oscurecimiento de la parte inferior del fondo y la firma.
One day ( I think while watching the movie «Iron Man 2» ) I came up with the
idea of a «laser whip.» But some time passed before I found the inspiration to
integrate that idea into an illustration …
I started creating the background for the image, later the base color for the girl,
in another layer I integrated the details of the skin and the shadows, then added
the clothes and eyebrows, hair, earrings, facial makeup …
In the last stages I incorporated the hilt and the whip, the red glow and a thin
red edging silhouetting the girl.
The last touches consisted of adding glitter to the metallic elements of the
clothing, the darkening of the bottom of the background and the signature.


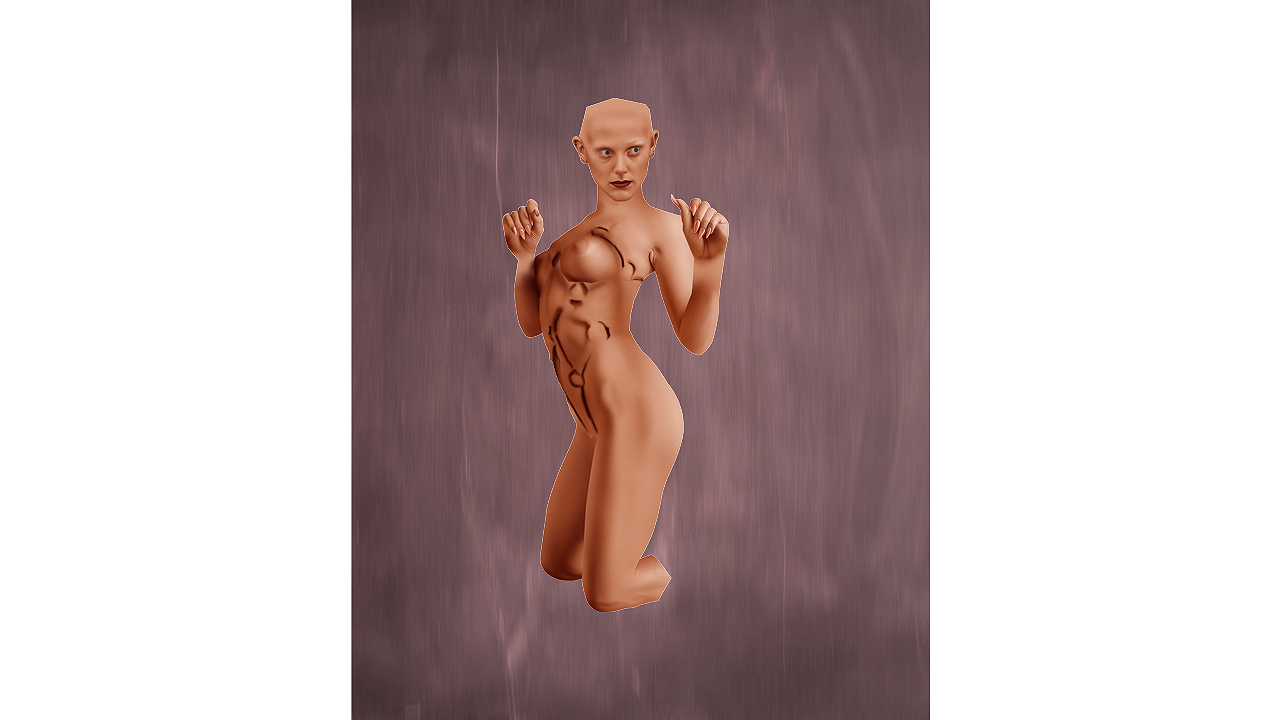


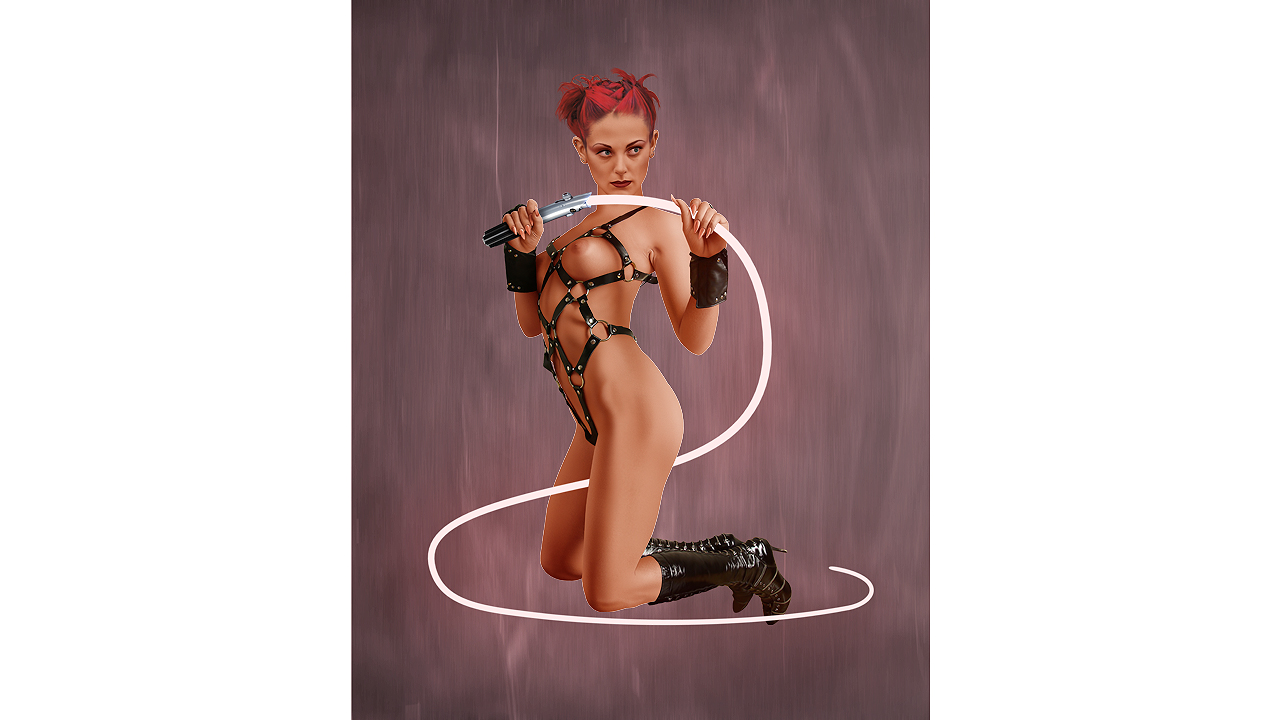


ASSASSIN
En primer lugar creo el fondo con dos capas independientes. Luego, añado la
chica, la ropa, la pistola y el pelo.
Posteriormente, les toca el turno a la bala y el casquillo ( modelados en 3D, y
emborronados para dar la sensación de movimiento ) y el fogonazo del disparo.
Añado unos brillos a los elementos metálicos de la ropa, a las aristas del arma
y una estela en la bala para reforzar la sensación de movimiento y velocidad.
También incorporo el humo que desprende el casquillo recién expulsado.
Finalmente duplico una de las capas que utilicé en el fondo y la superpongo
sobre todas las demás, alterando además su modo de fusión para que
oscurezca toda la ilustración. Por último, añado la firma de rigor…
First I create the background using two independent layers. Then I add the girl,
the clothes, the gun and the hair.
Later, it is the turn of the bullet and the bullet shell ( modeled in 3D, and blurred
to give the sensation of movement ) and the flash of the shot.
I add some glitter to the metal elements of the clothes, to the edges of the
weapon and a trail in the bullet to reinforce the sensation of movement and
speed. I also incorporate the smoke that comes out of the newly ejected bullet
shell.
Finally I duplicate one of the layers that I used in the background and I
superimpose it on all the others, altering also its mode of fusion so that it
darkens the whole illustration. Finally, I add the signature …


CHARLOTTE
En este retrato digital de la actriz y cantante francesa Charlotte Gainsbourg
incorporé un efecto de transparencia en la parte inferior de la imagen para
conseguir el efecto de desvanecimiento gradual…
Básicamente consistió en añadir una capa ( que incorpora un degradado de
blanco a transparente ) y situarla justo por debajo de la capa que utilizo para
los poros de la piel.
De esta forma, se consigue que la imagen desaparezca progresivamente a la
vez que continúan apreciándose los detalles de las manos y la cintura.
In this digital portrait of french actress and singer Charlotte Gainsbourg I
incorporated a transparency effect at the bottom of the image to get the gradual
fading effect …
Basically it consisted of adding a layer ( which incorporates a gradient from
white to transparent ) and placed it just below the layer that I use for the pores
of the skin.
In this way, it is achieved that the image disappears progressively while the
details of the hands and the waist can be seen.
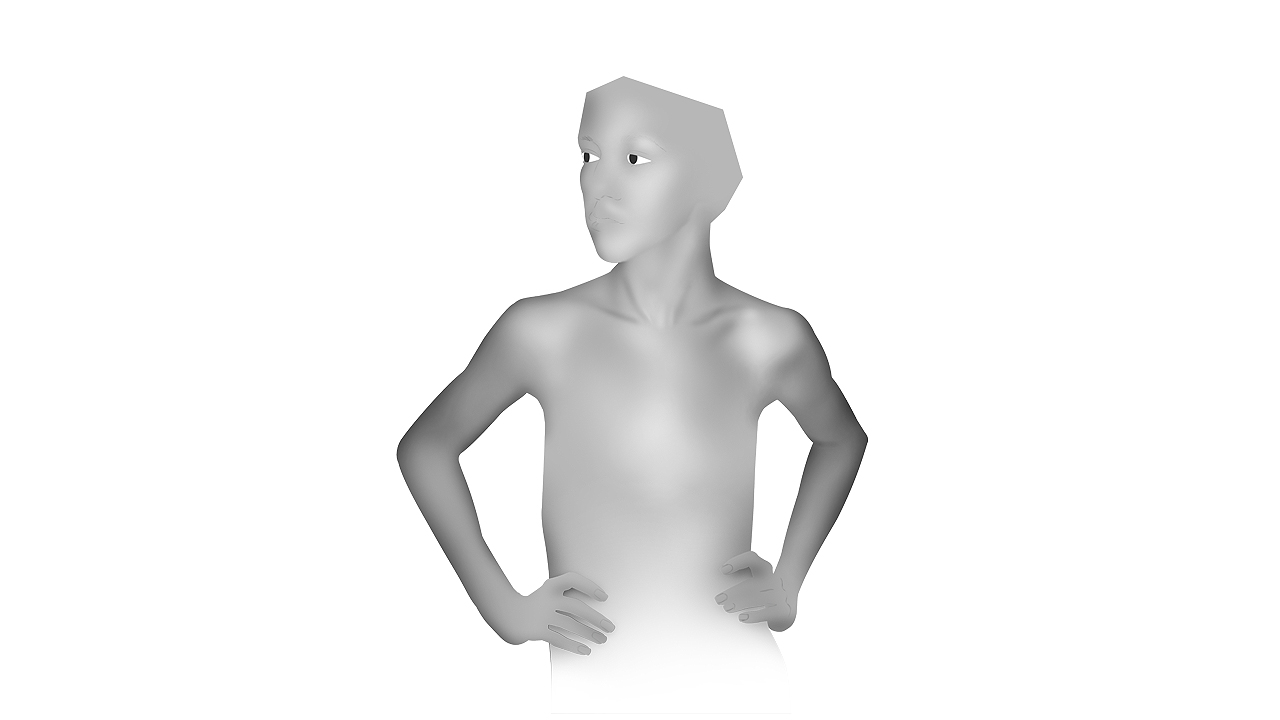


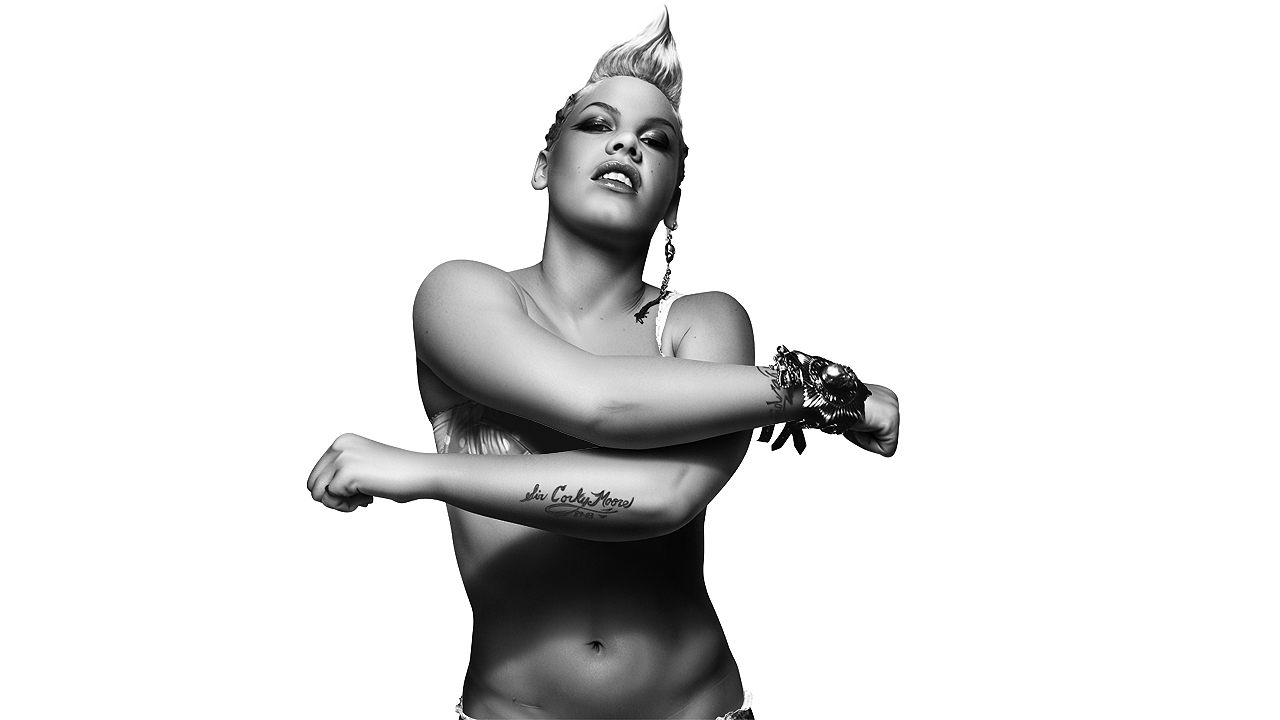
P!NK
En este retrato digital de la cantante estadounidense Alecia Moore ( más
conocida como Pink ) se pueden apreciar claramente las ventajas de trabajar
con capas en Photoshop.
La primera fase consiste en aplicar el color base de la piel ( no es necesario
detallar mucho el dibujo, puesto que en capas posteriores me dedicaré a ello ).
Posteriormente utilizo otra capa para los poros de la piel, arrugas, sombras,
etc…
Añado en una capa nueva las cejas, las pestañas y los tatuajes. Luego le toca
el turno a la ropa, el pelo y las joyas.
Como toques finales, añado unos brillos a las joyas, un fondo abstracto, un
delgado ribete blanco silueteando a la cantante y por supuesto la firma. Listo…
In this digital portrait of american singer Alecia Moore ( better known as Pink )
you can clearly see the advantages of working with layers in Photoshop.
The first phase is to apply the base color of the skin ( it is not necessary to
completely detail the drawing, since I will dedicate new layers to it ).
Later I use another layer for the pores of the skin, wrinkles, shadows, etc …
I add in a new layer the eyebrows, the eyelashes and the tattoos. Then it’s the
turn of clothes, hair and jewelry.
As finishing touches, I add some glow to the jewels, an abstract background, a
thin white trim silhouetting the singer and of course the signature. Ready…


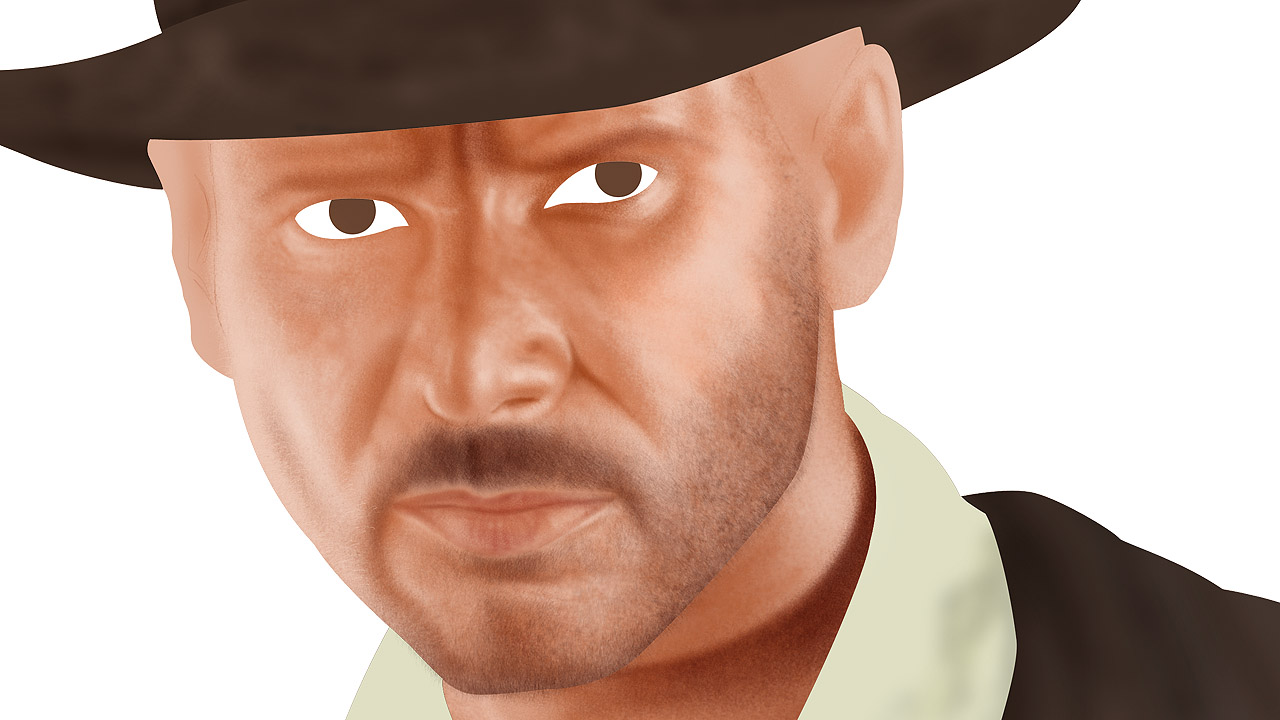
INDIANA JONES
Una de mis películas favoritas es “En busca del Arca perdida”, en la que
Harrison Ford interpreta magistralmente al arqueólogo Indiana Jones ( sin
duda, el papel de su vida, junto a Han Solo y Rick Deckard ). En este retrato
digital me centré básicamente en la expresión facial y la textura de la ropa y el
sombrero.
En una primera capa sitúo el dibujo con sus colores básicos. Sobre ella, añado
capas adicionales para ir detallando las luces y las sombras, la barba, las
cejas, las pestañas…
Finalmente me centro en la camisa, la cazadora y el sombrero, a los que
dedico una capa más.
Por último, añado los jeroglíficos del fondo, que también modifico ajustando el
tono, la saturación y el brillo, y la firma.
One of my favorite films is «Raiders of the lost Ark,» in which Harrison Ford
masterfully plays archaeologist Indiana Jones ( definitely the role of his life,
along with Han Solo and Rick Deckard ). In this digital portrait I basically
focused on the facial expression and the texture of the clothes and the hat.
In a first layer I place the drawing with its basic colors. On it, I add additional
layers to detail the lights and shadows, the beard, eyebrows, eyelashes …
Finally I center my work on the shirt, the jacket and the hat, to which I dedicate
one more layer.
Finally, I add the hieroglyphs background, which I also modify by adjusting the
pitch, saturation and brightness, and signature.


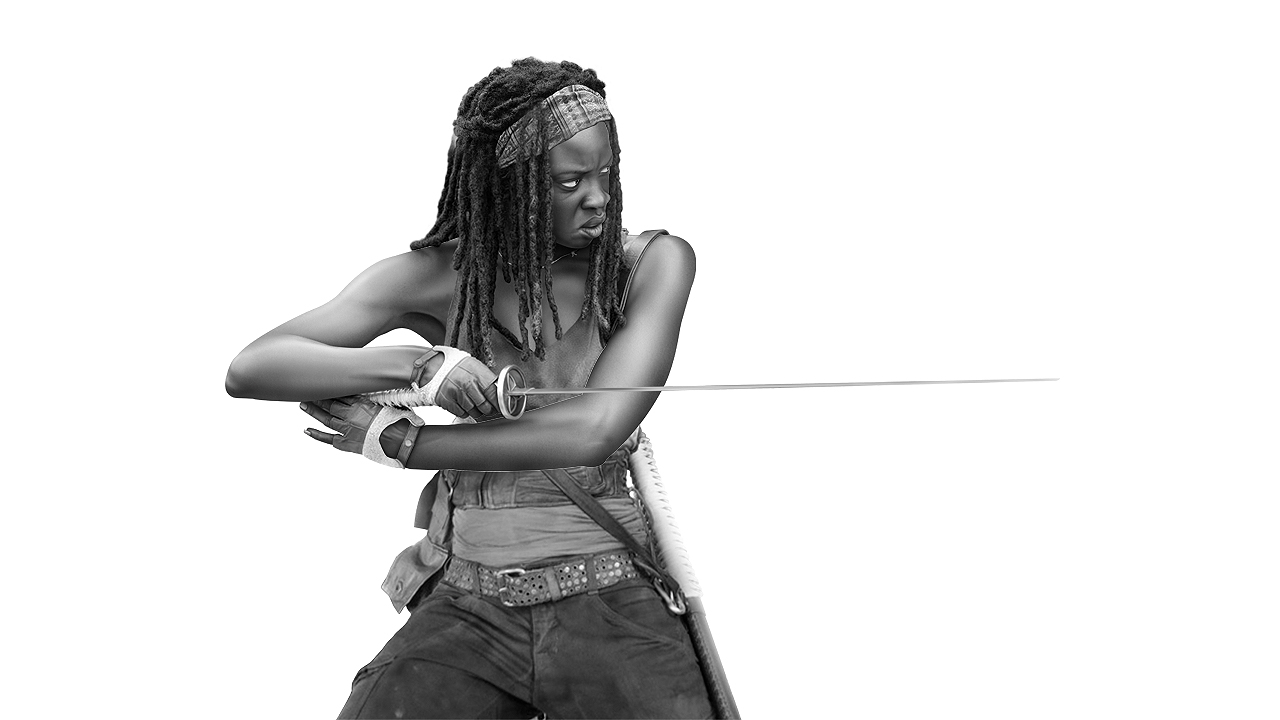
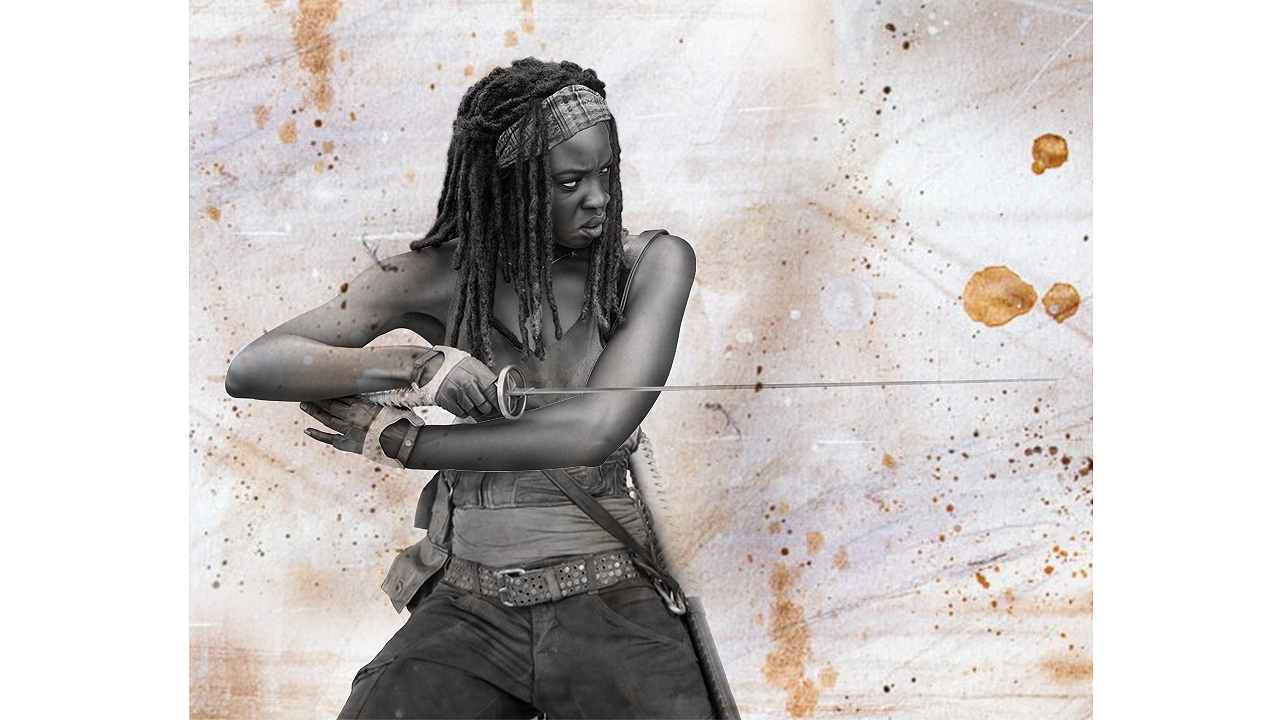
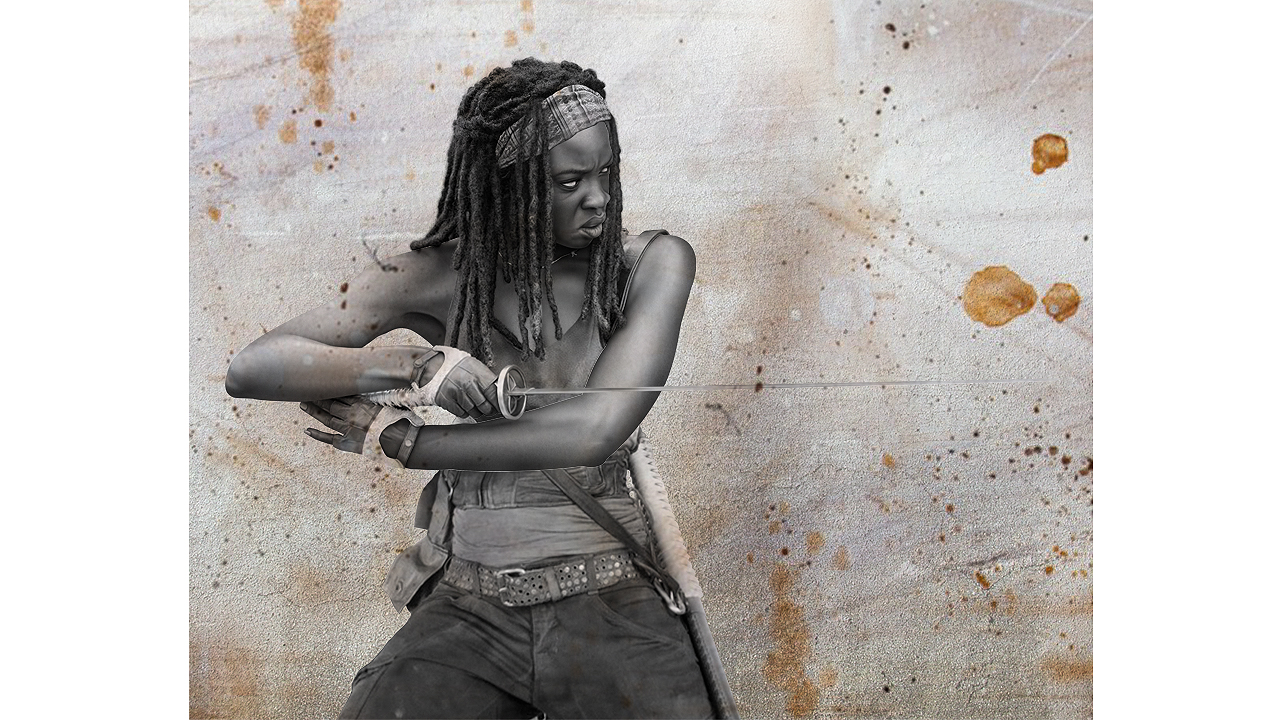
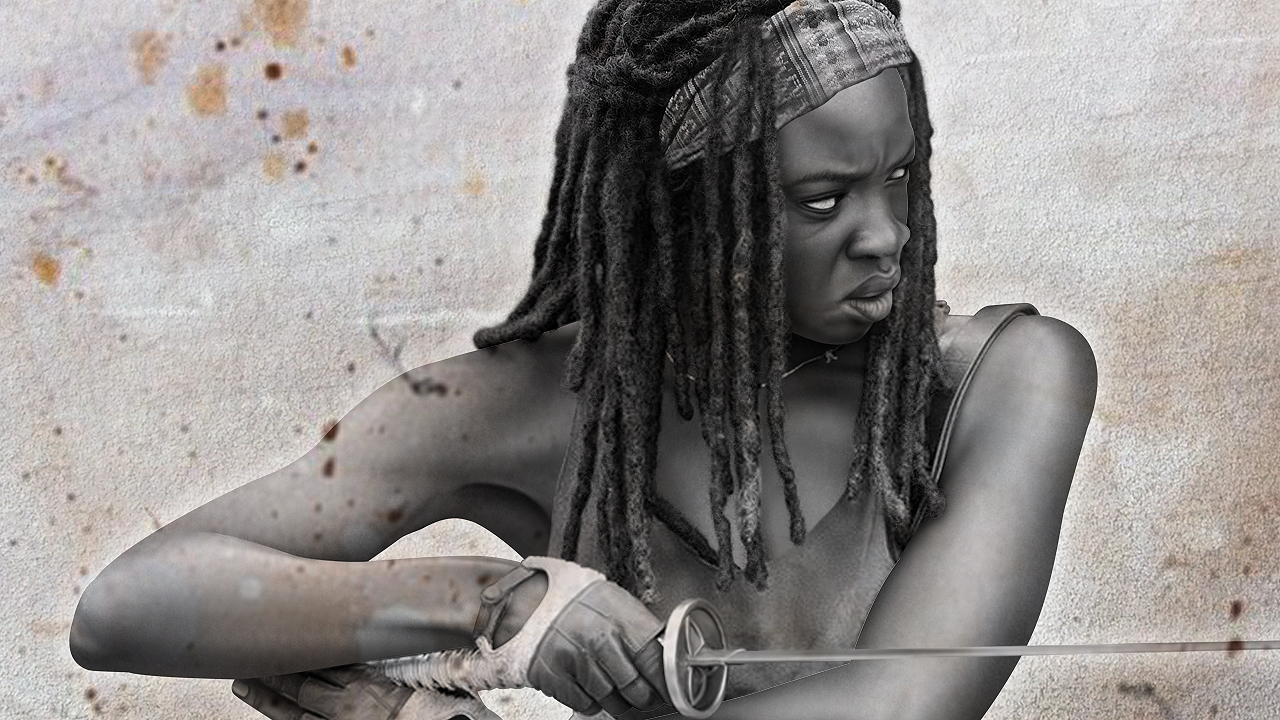
MICHONNE
Aquí tenéis el proceso que seguí para la ilustración de Michonne de The Walking Dead
( personaje interpretado por Danai Gurira ). Quise darle un toque ‘’sucio’’ al fondo
de la imagen, ya que la serie de televisión está ambientada en un escenario apocalíptico…
La primera fase del trabajo consiste en aplicar los tonos básicos. Posteriormente añado
una capa adicional para los poros y los detalles de la piel.
Luego añado la ropa, el pelo, la espada, etc… y en una capa más los pequeños detalles
de las rastas, las cejas y las pestañas.
Por último, añado el fondo ( en dos capas independientes ), el halo blanco silueteando
a la protagonista, y la firma.
Here’s the process I followed for the illustration of Michonne from The Walking Dead
( character played by Danai Gurira ). I wanted to give a ‘’ dirty ’’ touch to the
background, since the television series is set in an apocalyptic scenario …
The first phase of the work consists of applying the basic tones. Later I add an additional
layer for pores and skin details.
Then I add the clothes, the hair, the sword, etc … and in one more layer the little
details of the dreadlocks, eyebrows and eyelashes.
Finally, I add the background ( in two independent layers ), the white glow outlining
the protagonist, and the signature.


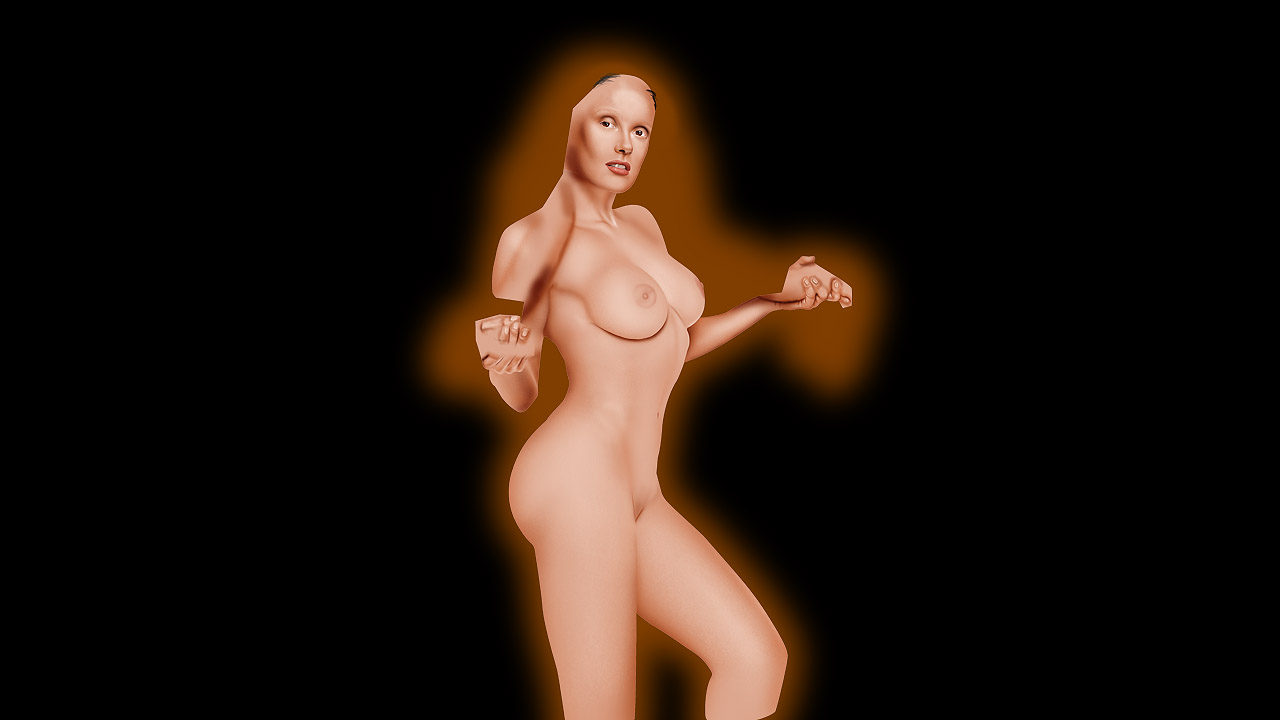
SATANICO PANDEMONIUM
La pequeña pero curvilínea Salma Hayek interpretó magistralmente a Satanico Pandemonium en la
película de Robert Rodriguez ‘’Abierto hasta el amanecer’’. Para mi homenaje a dicho personaje
preparé dos ilustraciones: Vestida ( por decirlo de alguna forma ) y desnuda.
Empiezo con el halo naranja que silueteará la ilustración, y continúo con la capa base y la de
los poros de la piel.
Posteriormente, añado el pelo y la serpiente. Hasta aquí termina el trabajo básico para la versión
desnuda.
Luego dibujo el bikini y por último incluyo un contorno amarillo ( que también aparece en la
versión desnuda ).
Finalmente, añado las llamas ( el toque infernal ) y la firma. Listo.
Petite but curvy Salma Hayek masterfully portrayed Satanico Pandemonium in Robert Rodriguez’s
film «From Dusk Till Dawn.» For my tribute to this character I prepared two illustrations:
dressed ( so to speak ) and naked.
I start with the orange glow that will outline the illustration, and continue with the base layer
and that of the skin pores.
Later, I add the hair and the snake. So far the basic work for the nude version ends.
Then I draw the bikini and finally include a yellow outline ( which also appears in the nude version ).
Finally, I add the flames ( the infernal touch ) and the signature. Finished.